-40%
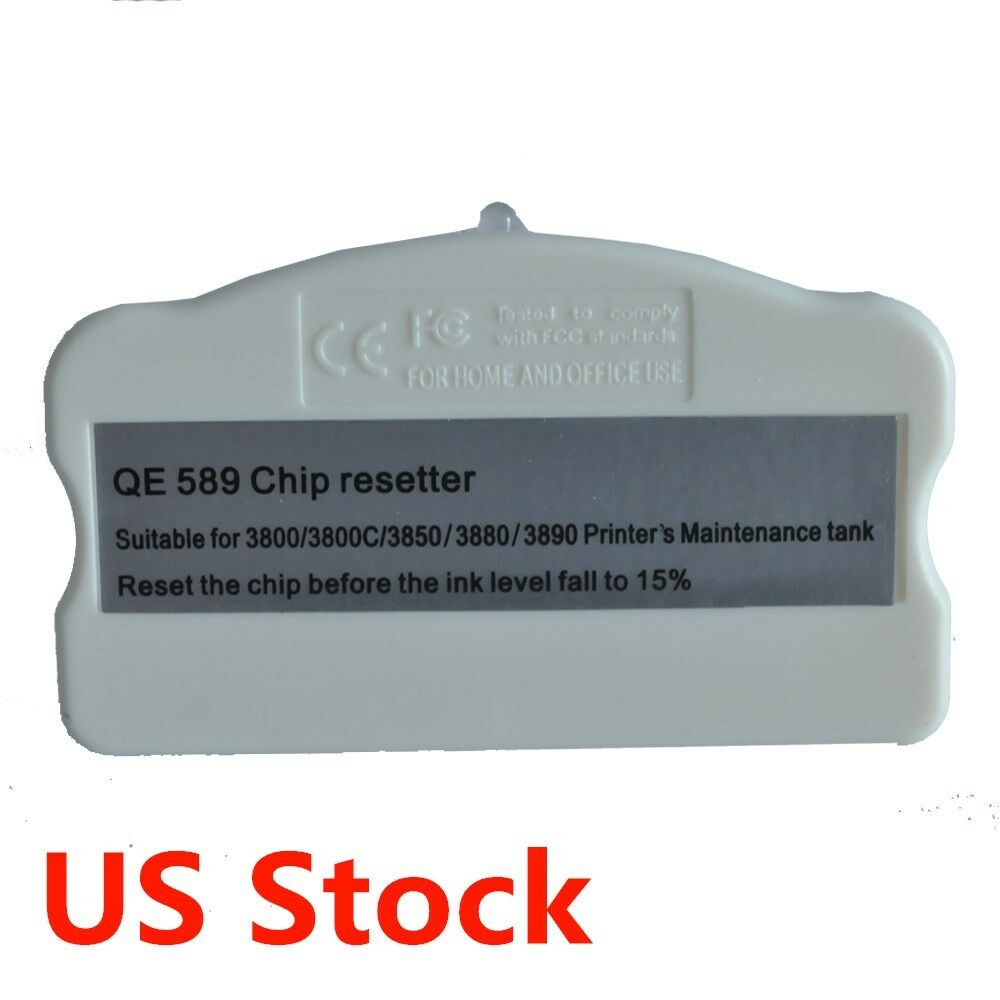
Epson Ink Cartridge / Maintenance Tank Chip Resetter for 3800 / 3880 US Stock
$ 12.79
- Description
- Size Guide
Description
US Stock-Epson Ink Cartridge / Maintenance Tank Chip Resetter for Stylus Pro 3800 / 3800C / 3850 / 3880 / 3890 / 3885Epson Maintenance Tank Chip Resetter for Stylus Pro 3800 / 3800C / 3850 / 3880 / 3890 / 3885
Printer Compatibility:
Epson Stylus Pro 3800 / 3800C / 3850 / 3880 / 3890 / 3885
Packing Size:
18.5*15*4.5cm
Gross Weight:
0.044kg
Manufacturer:
Ving Parts
Feature:
1. Our Chip Resetter Guarantee special use on your Epson Stylus Pro 3800/3880 maintenance tank.
2. It could be reset both of the Epson Stylus Pro 3800/3880 maintenance tank and ink cartridge.
3. After resetting you could continue use your maintenance tank. It helps the maintenance tank work longer saving your money.
The usage of Epson maintenance tank chip resetter:
1. We highly recommend to reset your waste ink tank before it goes to full.
2. Fit the chip to the groove of chip resetter, and enable the probe of chip resetter contacts the contactor of the chips.
3. Press the 2 components together. If the red light gleams, it means the connection is fine.
4. Five seconds later, the red light turns to green, and it indicates the chip data has been refreshed.
5. When the waste ink is full, take out the sponge from waste ink tank, and clean it, then put it back into waste ink tank and reuse.
How to reset the maintenace tank on EPSON Pro 3800/3880?
OPTION 1
(TWO WASTE TANKS AVAILABLE)
It'd better prepare 2pcs of maintenace tanks when using our chip resetter.Because the 3800/3880 printer will record the data and the ink level status when using the maintenance tank.
a) When the first maintenance tank's ink level is low, use WASTE chip resetter to reset it, then the ink level will reset to full status.
b) Install the second maintenance tank in the 3800/3880 printer, the second maintenance tank data and ink level will be recorded by the printer. Then the first maintenace tank data record has been removed.
c) When the second maintenance tank's ink level is low, put the first maintenance tank in the printer. Then the maintenance tank is ready to work.
OPTION 2
(NO SECOND WASTE TANK AVAILABLE BUT DEAD EMPTY FACTORY CART CHIP IS AVAILABLE)
Use the original cyan chip to do the reseting and chip tape we have supplied.
a) Take out the maintenace tank chip when the level is down, then reset the maintenance tank chip.
b) Install the "Cyan" original chip to the maintenance tank, then put it in the printer, the printer will remark error.
c) Take out the maintenance tank and take out the "C" chip, install the reset maintenance chip.
d) Install the reset maintenance tank to the printer. The reset maintenance tank will work .
E) Retain the CYAN chip in case you need to reset tank again in the future.
Troubleshooting
Error Message of "NO MAINTENANCE CART" ?
If you see this error message from the LCD panel, please make sure you did install the maintenance cartridge and close the cover. If this does not help, try to clean up the maintenance cartridge chip. Wipe the chip clean with a soft cloth or paper tower and a little bit water. Make sure that the chip is completely dry before putting the maintenance cart back. The problem still exists, please try the following:
1) Turn off printer.
2) Replace two cartridges which have our control chips on them to Epson's original cartridges. For example, replace PK and LK refill cartridges (which have control chips) to Epson's PK and LK cartridges.
3) Remove the the rest 7x refill cartridges and maintenance cartridge and remove the tape from the 4th pins.
4) Install all the cartridges and waste ink maintenance cartridge back to printer.
5) Power on printer. If your 3800 can recognize all the cartridges and waste ink maintenance cart, keep working on step 6.
6) Power off printer.
7) Remove all 9x cartridges, maintenance cartridges, and switch key.
8) Tape off the 4th pins on all the 7x refill cartridges and maintenance cart.
9) Replace 2x Epson cartridges with refill cartridges which have control chips. Do not insert the cartridges yet.
10) Power on printer.
11) Wait till printer shows no cartridge installed.
12) Install all the ink cartridges back to printer, then install switch key.
13) Wait for LCD shows "NO MAINTENANCE CART" then install maintenance cart back to printer and close the maintenance cart cover.
